How to Add an Image to a Test or Quiz

How to Add and Image to a Test or Quiz in Bridges:
1. Navigate to the Home menu on your Bridges page:

2. Create a folder and upload your exam images:

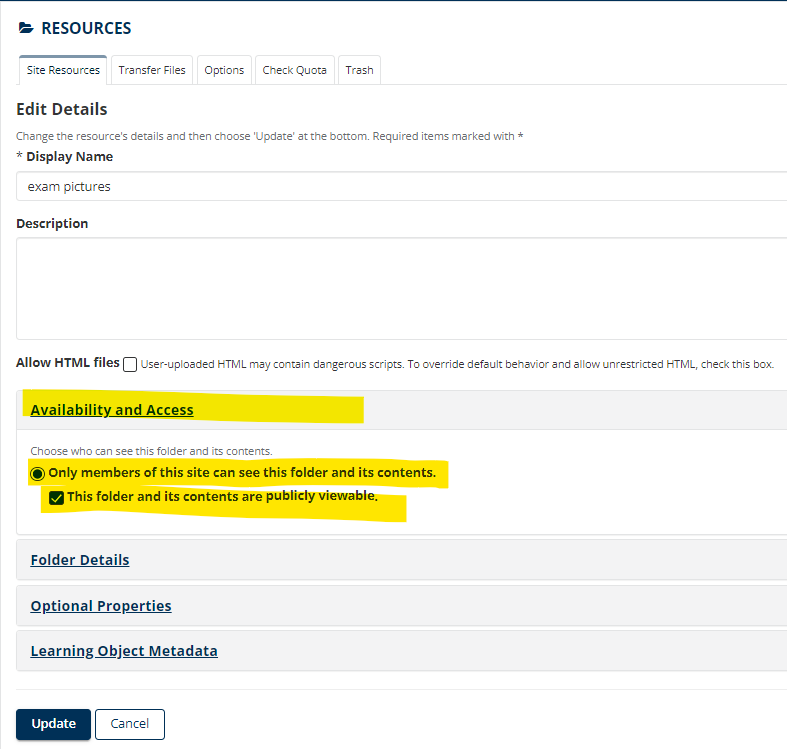
3. Go into “edit details” at the folder level and make sure that your folder is publicly viewable, ensuring that any section can access it:

4. Go back into your course, and then navigate to your test or quiz.
5. Add a question to your test.
6. In the text box in the question editor, click Show Rich Text Editor:

7. Click on the image icon shown in the rich text editor box.
8. Click Browse Server.
9. Click on the Resources folder in your home directory and pull up your file. Bridges maps the images to your resources.

10. Click on the file you want to place.
11. Resize your image and click okay:

12. This is what the picture will look like, you can resize by right clicking on the image and then editing the image size:
You can write your question in the text box as well.

13. Save your question and this is what your question will look like in the the exam preview mode:

14. This is a screen shot from the student view of the question in the exam:

15. (optional step) If you want to make double sure the student has access to the picture, you can upload a local file from your computer and add it as an attachment:

For further assistance, please email id@rwu.edu