Uploading or recording a video to Panopto and Sharing

- 1. Log in to Bridges
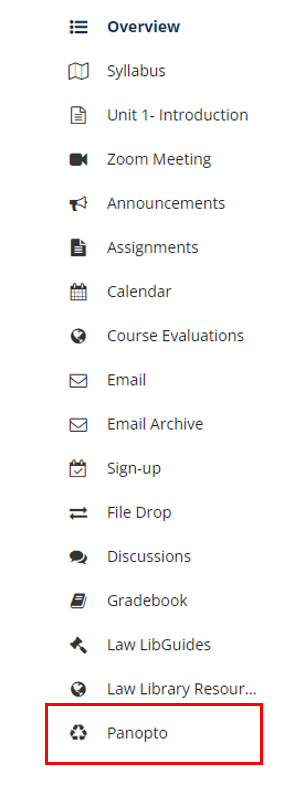
- 2. Click on the Panopto tool from the course menu on the left:
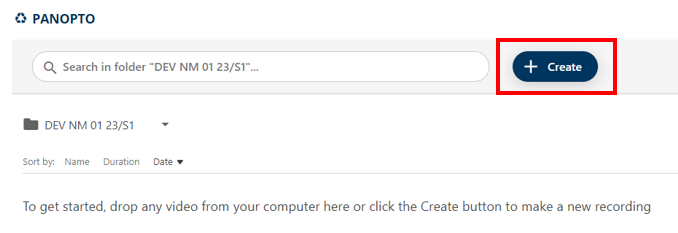
3. Click on the Create button
4. Select the "Create" button and then select "Upload Media"
or
"Panopto Capture" if you would like to record a video
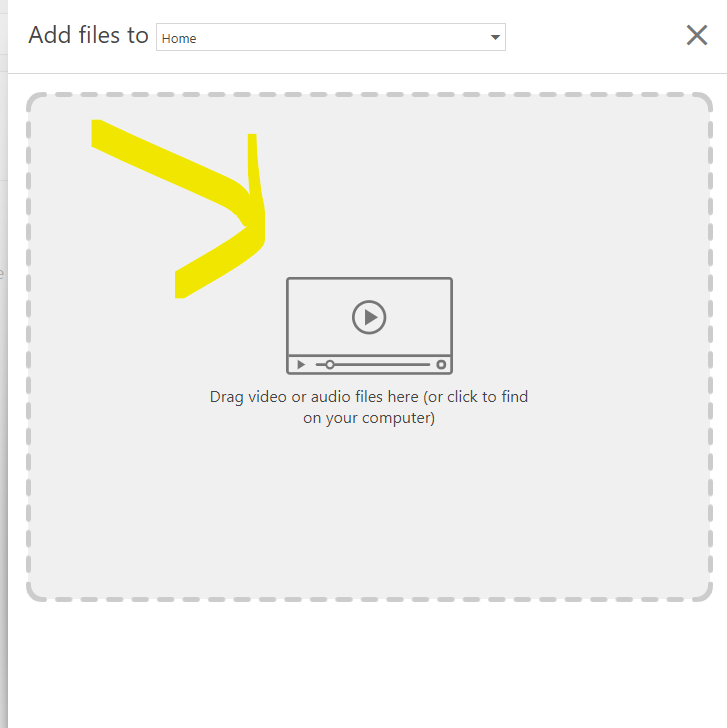
5. If you selected "Upload Media" you will be presented with this box.
Click on the box and select the media file from your local or cloud drive:
6. If you selected Panopto Capture you will be presented with the Recorder:

Record or upload you videos accordingly.
To distribute your video:
7. Click on the "share" icon on the video preview:

7. Make sure it's set to "Public (unlisted)":
8. Select copy link:
The URL of the video will be copied to your clipboard. You can insert this this link anywhere in a Bridges course, or send via email. When a user clicks on the link, they can view the video.
For further assistance, please email id@rwu.edu