Zoom Client - Schedule Meetings
Schedule Meeting In Zoom Client
1. Open your Zoom client and sign in to Zoom.
2. Click on the Schedule icon.
Schedule Meeting Terms:
-
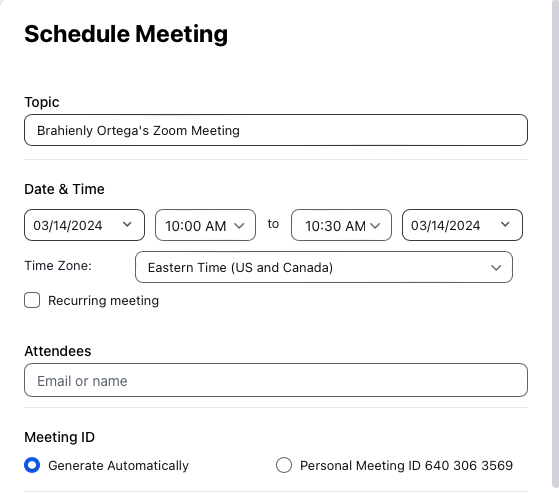
Topic: Enter a topic or name for your meeting.
-
Start: Select a date and time for your meeting. You can start your meeting at any time before the scheduled time.
-
Duration: Choose the approximate duration of the meeting. This is only for scheduling purposes. The meeting will not end after this length of time.
-
Time Zone: By default, Zoom will use your computer's time zone. Click the drop-down menu to select a different time zone.
-
Recurring meeting: Choose if you would like a recurring meeting (the meeting ID will remain the same for each session).
- Video
-
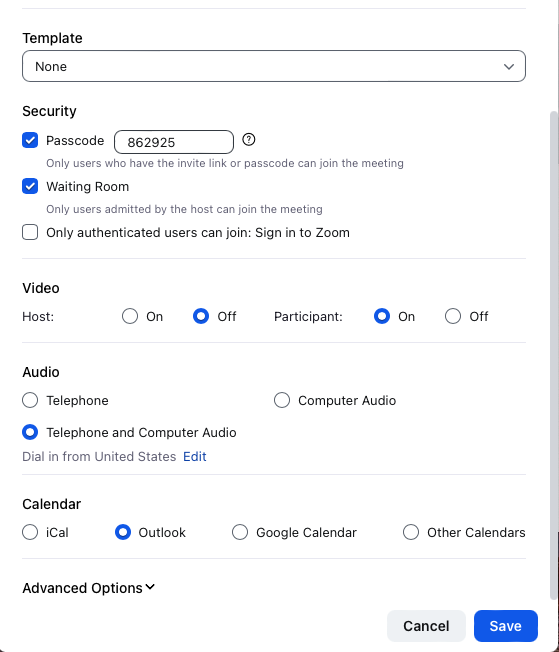
Host: Choose if you would like the host video on or off when joining the meeting. Even if you choose off, the host will have the option to start their video.
-
Participant: Choose if you would like the participants' videos on or off when joining the meeting. Even if you turn off, the participants will have the option to start their video.
-
Audio: Choose whether to allow users to call in via Telephone only, Computer Audio only, Both, or 3rd Party Audio (if enabled for your account).
-
Advanced Options: Click on the arrow to view additional meeting options.
-
Require meeting password: You can select and input your meeting password here. Joining participants will be required to input this before joining your scheduled meeting.
-
Note: The meeting password must meet these requirements.
- 10 characters maximum
- Passwords are case sensitive
- We recommend using alphanumeric characters and these special characters: @ * _ -
- The Zoom desktop client allows alphanumeric characters and these special characters: @ * _ -
- The Zoom web portal allows any characters, but the these characters are not allowed: & <>
-
Enable join before host: Allow participants to join the meeting without you or before you join. The meeting will end after 40-minutes for Basic (free) users if 3 or more people join the meeting.
-
Mute participants on entry: If join before host is not enabled, this will mute participants as they join the meeting. Participants can unmute themselves after joining the meeting. Note: To mute all participants currently in a meeting, see the options to manage participants.
-
Use Personal Meeting ID: Check this if you want to use your Personal MeetingID. If not selected, a random unique meeting ID will be generated.
-
Record the meeting automatically: Check this if you want the meeting to be automatically recorded. Select if you want it to be recorded locally (to your computer) or to the cloud (zoom.us/recording).
-
List on Public Event List: Post the meeting on the public meeting/webinar list so that anyone can view it. We recommend you add a meeting password to secure your meeting.
-
Schedule For: If you have scheduling privilege for another user, you will be able to choose who you want to schedule for from the drop-down menu.
-
Alternative hosts: Enter the email address of another Zoom user who is Licensed, on your account to allow them to start the meeting in your absence. Read more about Alternative Host.
-
Calendar: Select a calendar service to add the meeting to and send out invites to participants.
3. Click Schedule to finish, and open the selected calendar service to add the meeting.
Note: If you are scheduling a recurring meeting, you will need to set the recurrence in your calendar service.
Choosing Other Calendars will allow you to copy and paste the scheduled meeting information such as date, time, and meeting URL.