Panopto: Recording with Panopto Capture

Panopto Capture (in-browser recording): Chrome is recommended.
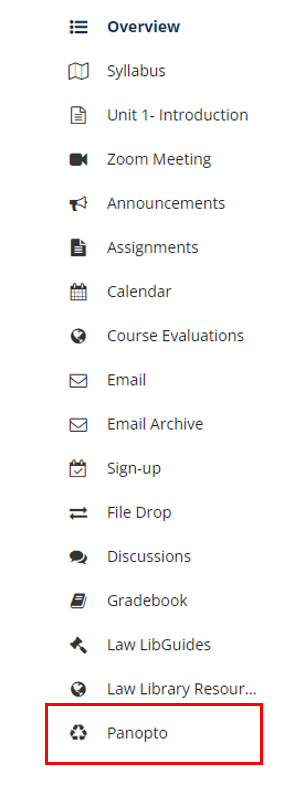
1. Log in to your Bridges course (or Home page).
2. Click on the Panopto tool from the course menu on the left:
3. You will be brought to your home or course folder, and the Create Button will be towards the center:
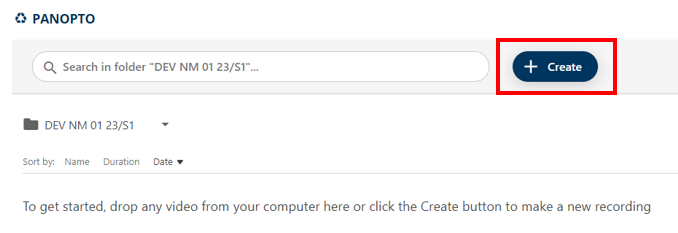
4. Click on the Create Button.
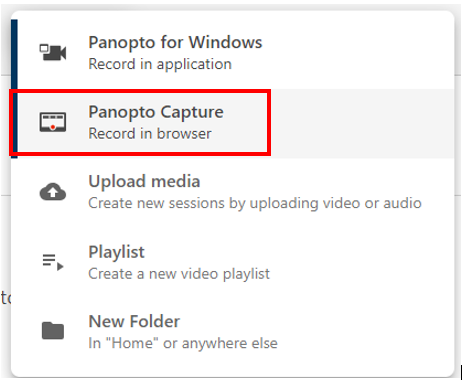
5. Click on Panopto Capture:
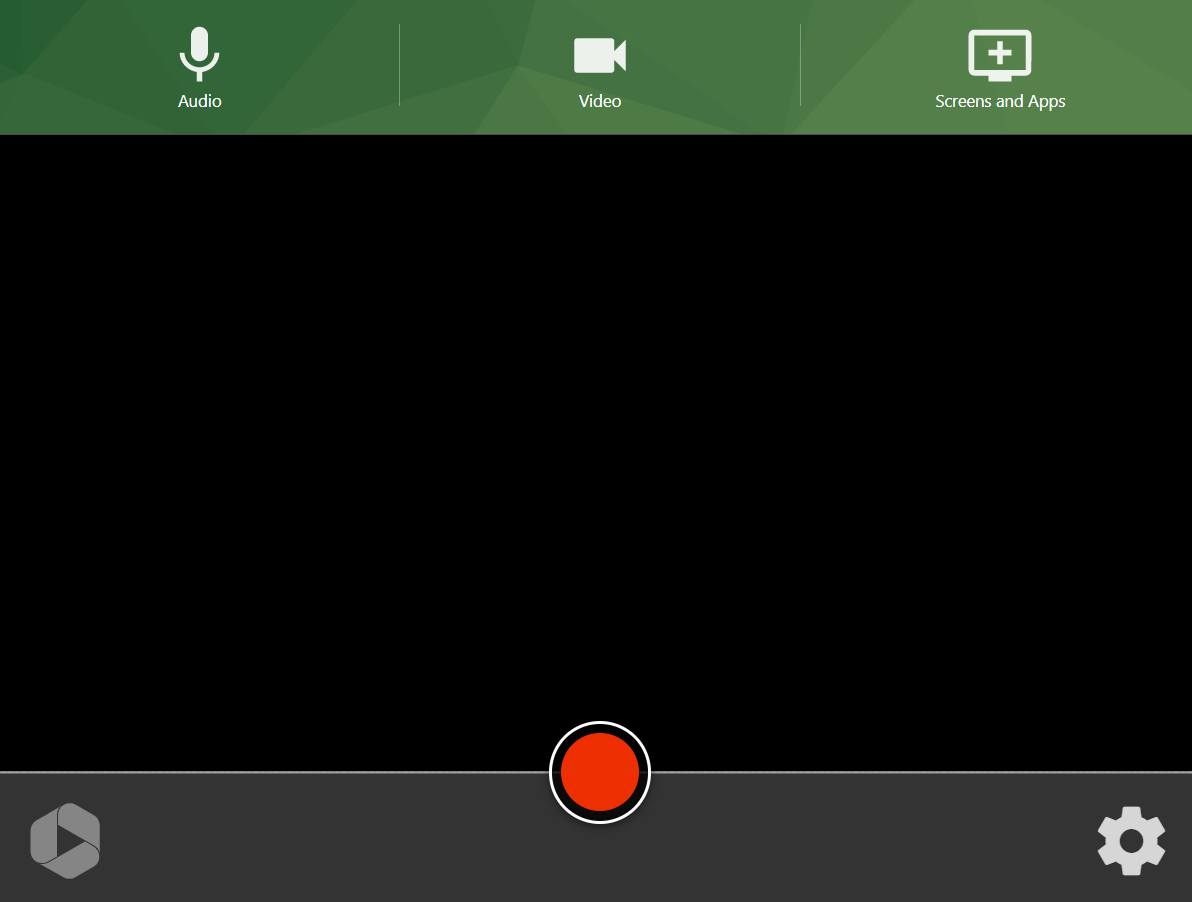
6. Select the inputs that will be used in the recording:
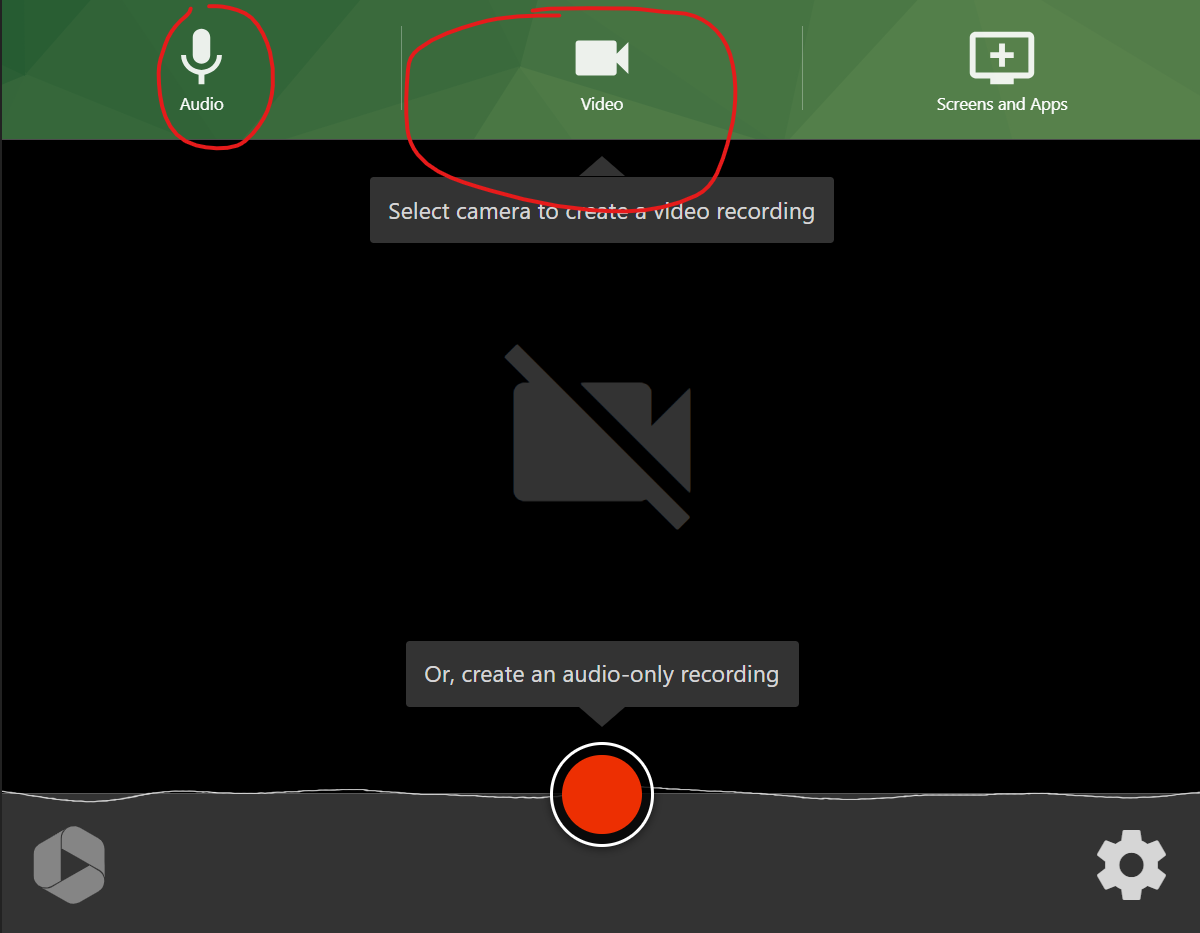
7. Click the red button at the bottom to begin recording:
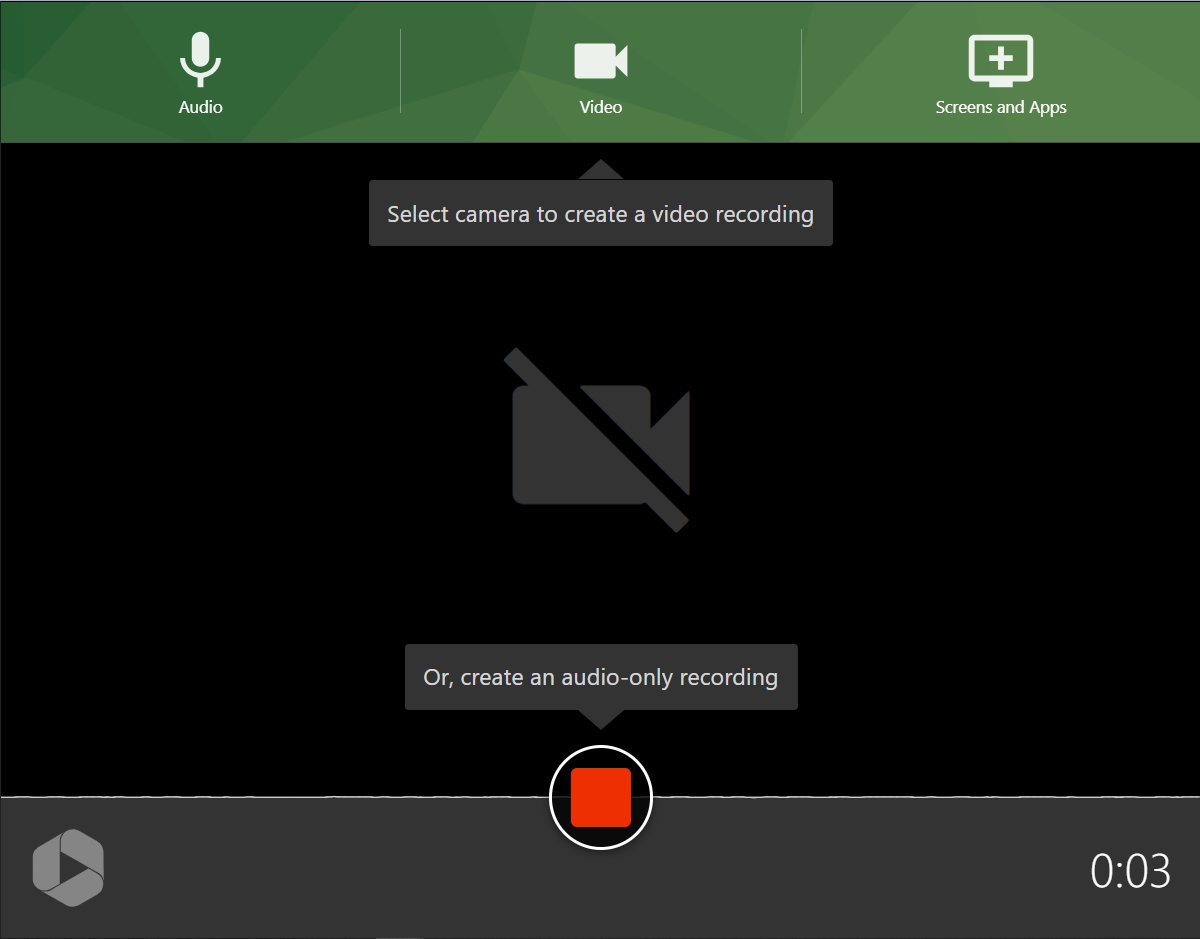
8. Select the red square at the bottom to stop the recording:
The recording is automatically sent to Panopto.
Click the icon below to view a video on how to use the in-browser version of Panopto Capture. Please note that the screensteps will guide you through the new integration, and location of the "create button"

For further assistance, please email id@rwu.edu